
One of the best features of the Windows operating system is to allow users to lock and unlock USB ports. Users often share their laptop or PC with other people. If someone has bad intentions can steal our important documents through a pen drive or inject malicious files into the system to damage the device. In this case, users may need to block the USB ports to prevent the unauthorized copying of sensitive data. Blocking or disabling USB ports also keeps your system from becoming infected with viruses or other malware.
There are several methods like device manager, registry editor, and any other third-party applications that allow you to block the USB ports in your Windows system. In this tutorial, we will show you various methods to lock down the USB Ports in Windows 10.
Lock Down USB Ports Using the Registry
Using the Windows Registry editor, you can easily block or unblock the USB Ports. Follow the below steps to block the USB port via Registry editor:
Step 1 – Press the “Window + R” key to open the RUN box or access the Search box in the Windows Start menu.
Step 2 – Type the regedit in the RUN box or Search box then press the Enter key to open the Registry editor. You should see the following screen:
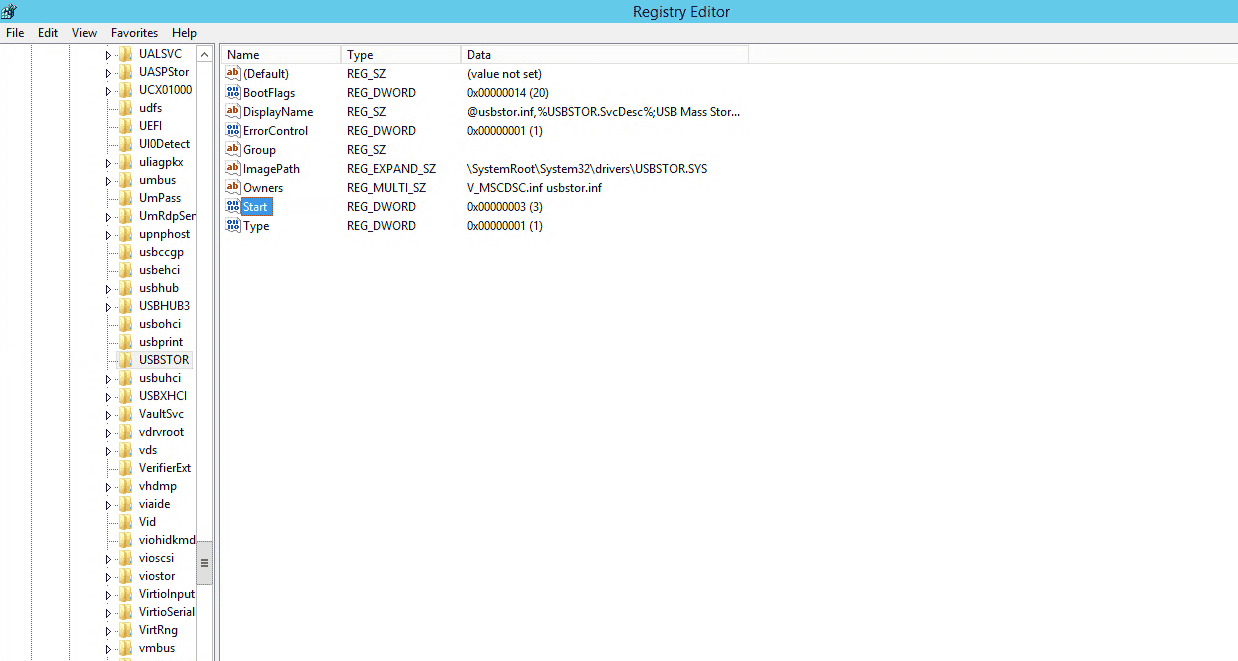
Step 3 – Navigate to the HKEY_LOCAL_MACHINE => SYSTEM => CurrentControlSet => Services => USBSTOR then click on the Start option to open the “Edit DWORD (32–bit) Value” Window.
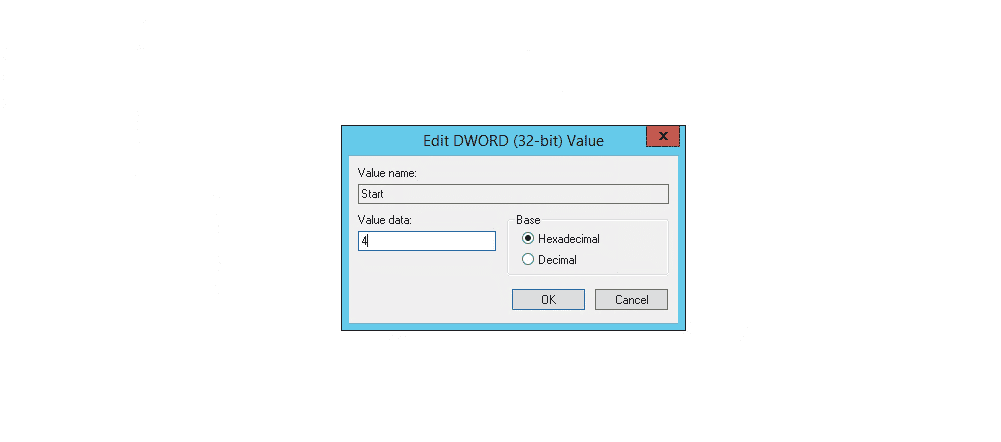
Step 4 – To lock down the USB Ports or Drives, change the “value data” to ‘4‘ and then click OK.
If you want to unblock the USB Ports again, change its value to 3 and then click OK.
Step 5 – Next, you will need to restart your system to apply the changes.
Lock Down USB Ports Via Device Manager
You can also use the Device Manager to block and unblock the USB Ports. Follow the below steps to lock down the USB ports via Device Manager.
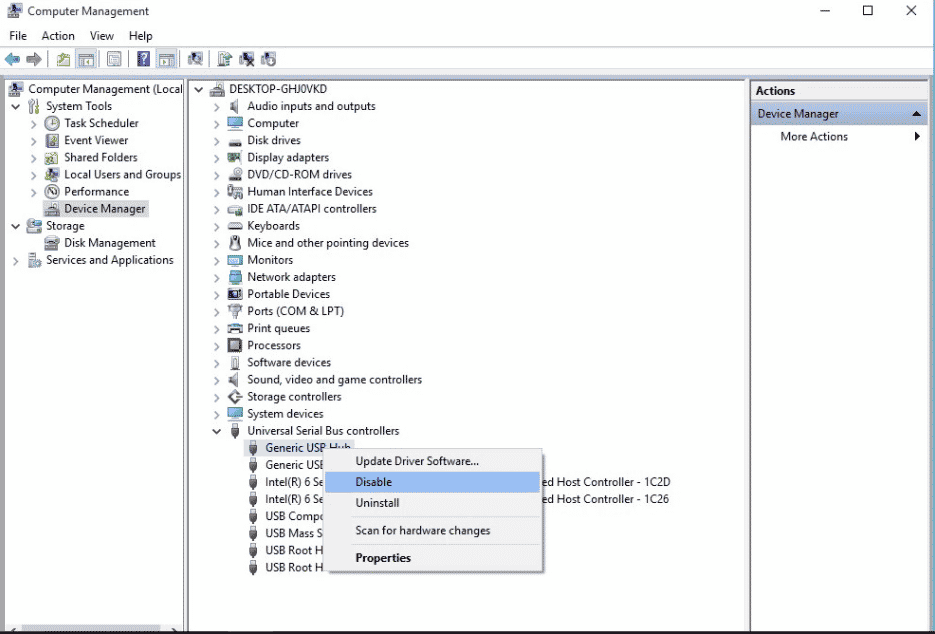
Step 1 – Right-click on the Start menu and click on the Device Manager to open the Device Manager Windows:
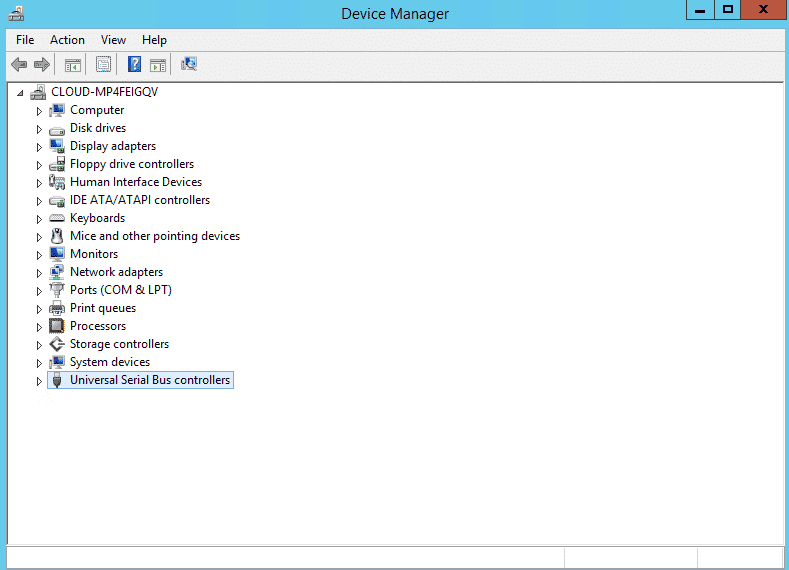
Step 2 – Click on Universal Serial Bus controllers to view all of the USB ports. Next, right-click on the USB port that you would like to disable then click on the “Disable device“.
Step 3 – Next, restart your system to apply the changes.
Lock Down USB Ports Using Group Policy
The Group Policy Editor is the key component of the Windows operating system. You can set user access control and many security related things using this tool. Follow the below steps to lock down the USB Ports via Group Policy.
Step 1 – Press the “Window + R” key to open the RUN box or access the Search box in the Windows Start menu.
Step 2 – Type “gpedit.msc” and press the Enter key to open the Group Policy Editor window:

Step 3 – Click on the Computer Configuration => Administrative Templates => System => Removable Storage Access. You should see the following screen:
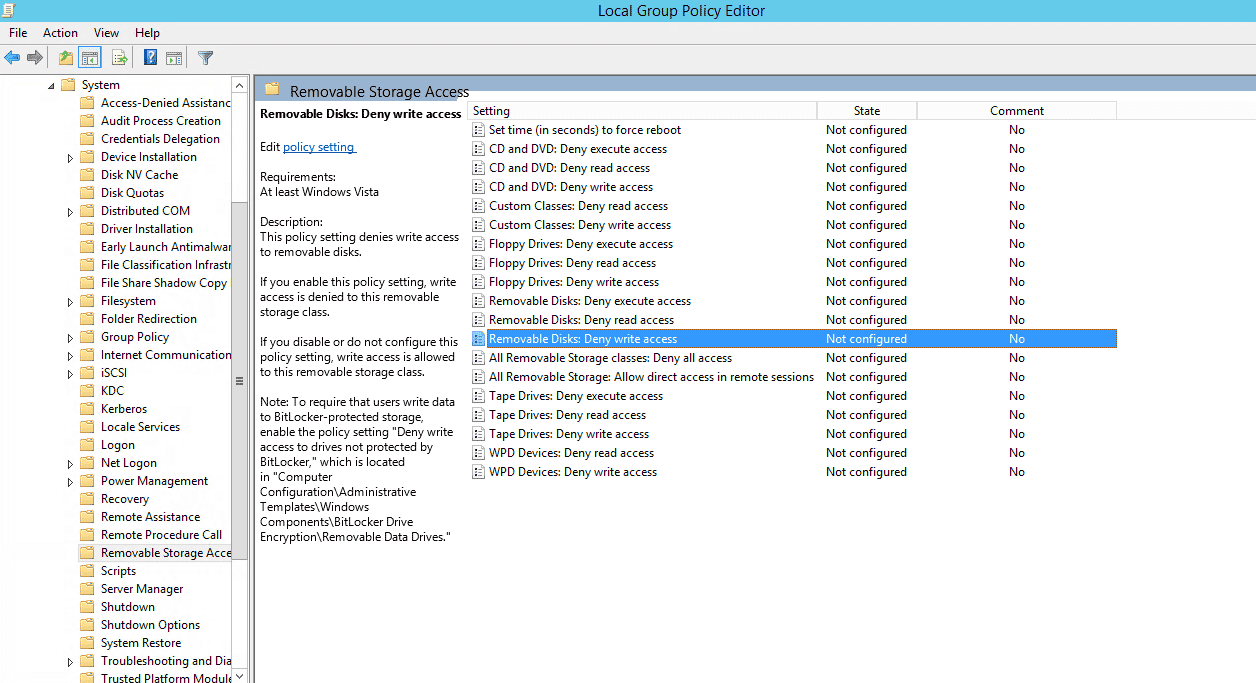
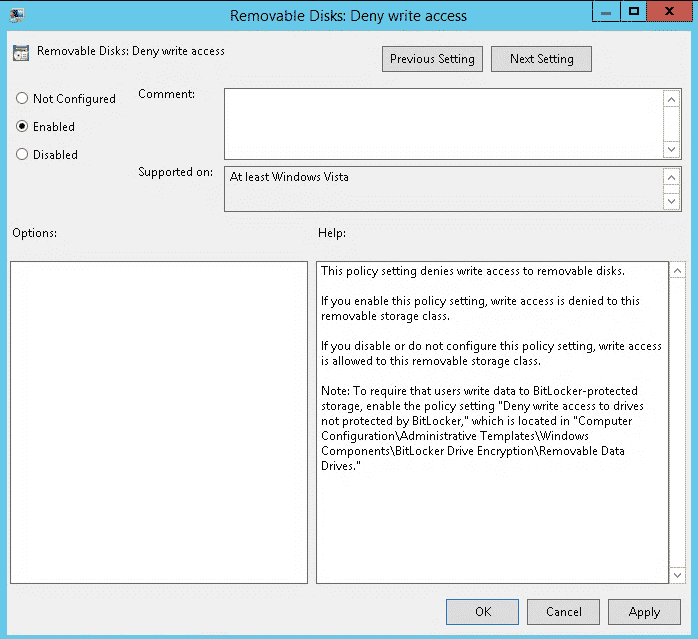
Step 4 – Click on both options “Removable Disks: Deny read access” and “Removable Disks: Deny write access” one by one then select the “Enabled” option and click on the OK button.
Step 5 – Next, restart your system to apply the changes.
Recommended Tool: ThreatLocker Storage Control – FREE TRIAL
ThreatLocker is an advanced tool for effectively locking down USB ports to prevent unauthorized access. With this tool, you can use granular policies to control who can access every USB device and what actions they can perform on each device. Also, every action performed on a USB device is logged to provide you with complete control and visibility into the USB operations.

Besides improving security, this tool helps with compliance as well, making it a good choice for enterprises that handle sensitive data. It is also ideal for companies that operate in regulated industries like healthcare and finance, as they have to comply with privacy-focused regulations like CCPA, GDPR, HIPAA, and more.
Another highlight of this tool is that users who need access can request it through an intuitive and simple pop-up. With this tool, there is complete transparency, reducing the chances of insider attacks and data theft.
Key Features of ThreatLocker Storage Control:
- Wide Range of Devices: You can use this tool on USBs, network shares, local folders, external storage devices, and more.
- Granular Control: Only authorized users and applications can access your storage devices.
- Digital Trail: Creates a digital trail of every access and action done by every user for detailed analysis.
- Audits: Centrally stores usage logs, making it easy to audit.
- Access Requests: Easy to access requests, as users can do so through a pop-up. Access can be granted to a USB in under 60 seconds!
- File Access Details: A detailed list of all accessed files on a USB is generated by the tool, within minutes after a file is opened.
You can start with a 30-day free trial.
Conclusion
In this post, we showed you three different methods to lock down the USB ports in Windows. You can now choose your suitable method to block the USB Ports easily.